
Christmas is the perfect time to get creative in the kitchen and enjoy the simple joy of baking. Today, I bring you an easy and fun recipe for Marbled Christmas Cookies that will brighten up any holiday table. These buttery cookies, decorated with vibrant icing, are as delicious as they are beautiful. This recipe is simple to follow, allowing you to create edible works of art that capture the festive spirit perfectly.

Ingredients You’ll Need for the Marbled Christmas Cookies:
For the Cookie Dough:
- Unsalted Butter: Brings a rich, buttery flavor to the dough, essential for that melt-in-your-mouth texture.
- Granulated Sugar: Sweetens the dough subtly and contributes to the tender texture.
- Eggs: Acts as a binding agent and adds moisture, helping the cookies stay soft.
- Vanilla Sugar or Vanilla Extract: Enhances the sweetness and complements the buttery flavor.
- All-Purpose Flour: Provides structure and stability to the cookies, balancing the wet ingredients.
- Salt: Essential for enhancing the flavor profile and balancing the sweetness.
For the Decoration:
- Powdered sugar: For the base layer of the marbled effect.
- Water or lemon juice
- Food coloring (gel or liquid, in your favorite festive shades): Adds contrast and depth to the swirls.
You’ll need the following tools for making the Marbled Christmas Cookies:
- Mixing Bowls: A large bowl for combining the cookie dough ingredients and smaller ones for measuring and melting the chocolate.
- Measuring Scale: To accurately measure all your ingredients in grams.
- Hand Mixer or Stand Mixer: For creaming the butter and sugars, and mixing the dough.
- Spatula: To fold in the dry ingredients and combine the mixtures.
- Baking Sheet: For baking the cookies.
- Parchment Paper: To line the baking sheet, preventing the cookies from sticking.
- Cookie Cutters: To create cute shapes.
- Cooling Rack: For allowing the cookies to cool evenly after baking.
- Toothpick: To create marble look.
- Rolling Pin: To roll out the dough.
Here is the full Recipe:
Ingredients:
For the Dough:
- 550 g (4 1/2 cups) all-purpose flour
- 250 g (1 cup) unsalted butter, softened
- 260 g (1 1/4 cups) granulated sugar
- 2 medium eggs
- 1/2 tsp vanilla powder (or 1 tsp vanilla extract)
- 1 pinch salt
For the Decoration:
- Powdered sugar
- Water or lemon juice
- Food coloring (gel or liquid, in your favorite festive shades)
Directions:
Make the Cookie Dough:
- In a large mixing bowl, combine the butter, sugar, and vanilla powder. Cream together until light and fluffy. Add the eggs one at a time, mixing well after each addition. Gradually incorporate the flour and salt until the dough comes together. Wrap the dough in plastic wrap and refrigerate for at least one hour. Chilling the dough ensures it’s firm and easy to roll out.
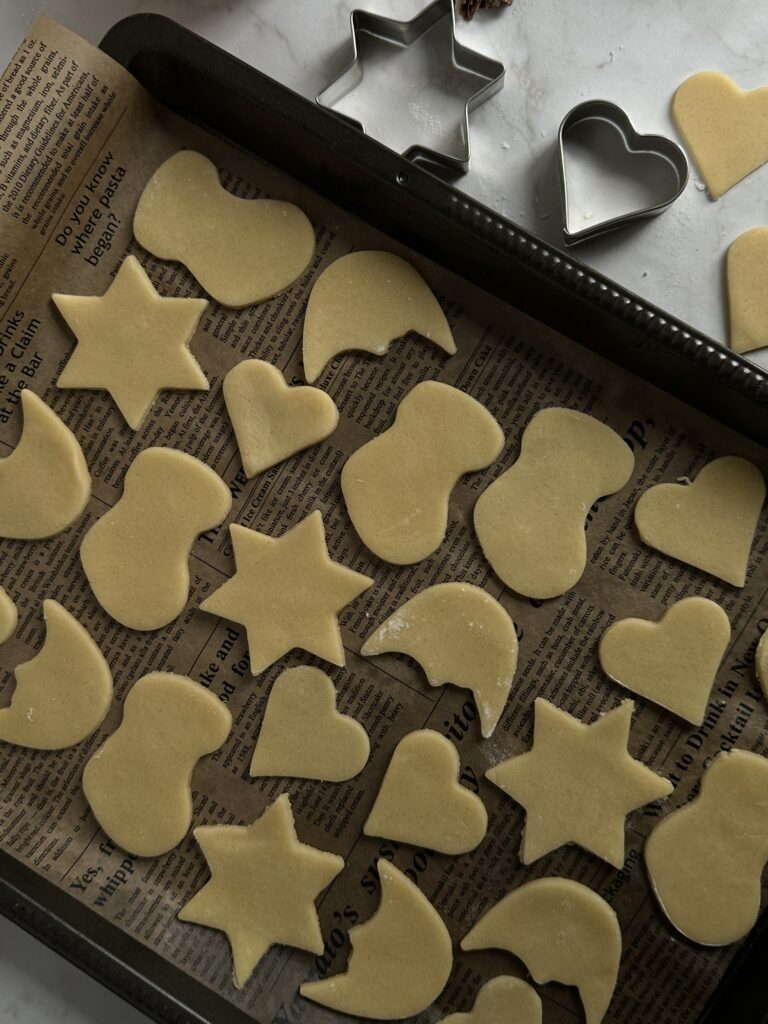
Roll & Cut the Cookies:
- Once the dough has chilled, roll it out on a floured surface to about 0.5 cm (1/4 inch) thickness. Use your favorite holiday-themed cookie cutters to cut out shapes—stars, snowflakes, Christmas trees, or classic circles work beautifully. Transfer the cut-out cookies onto a baking sheet lined with parchment paper.
Bake to Perfection:
- Preheat your oven to 200°C (390°F) for traditional top-and-bottom heating. Bake the cookies for 8–9 minutes, just until they are set but not browned. The pale golden color of these cookies is key to letting the chocolate decoration shine. Let the cookies cool completely on a wire rack before decorating.
Make the Icing:
- To make the icing, combine powdered sugar with a small amount of water or lemon juice. Start with a teaspoon at a time and stir until you achieve a thick but spreadable consistency.
- Divide the icing into separate bowls and add a few drops of food coloring to each, creating vibrant hues that reflect the Christmas spirit. For a marble effect, don’t completely stir in the colors; instead, swirl them lightly with a toothpick.
Decorate your Cookies:
- Once the cookies have cooled, it’s time to let your creativity shine! Use the colored icing to decorate the cookies with patterns, swirls, or festive designs. For easy application, you can use a piping bag with a fine tip or a simple zip-top bag with a small corner cut off.
- If you prefer a more rustic look, dip the tops of the cookies directly into the icing and let any excess drip off. Place the cookies on a wire rack and allow the icing to set completely before handling.
Tips & Tricks:
Tips for the Cookies:
- Chill the Dough: Don’t skip this step! Chilled dough is easier to work with and holds its shape better during baking.
- Get Creative with Colors: Use gel food coloring for the most vibrant shades without altering the consistency of your icing.
- Add Sprinkles or Edible Decorations: While the icing is still wet, sprinkle on edible glitter, sugar pearls, or festive sprinkles for an extra-special touch.
- Plan Ahead: These cookies store well in an airtight container for up to a week, making them perfect for holiday prep.
Variations to Try
- Citrus Zest: Add a teaspoon of lemon or orange zest to the dough for a bright, tangy flavor.
- Almond Touch: Replace a portion of the flour with almond flour for a nutty twist.
- Chocolate Drizzle: Instead of icing, drizzle the cookies with melted dark or white chocolate.
Why These Cookies Are Perfect for Christmas
- Easy to Customize: With simple cookie dough and colorful icing, you can decorate these cookies in endless ways, from traditional shapes like stars and trees to modern designs.
- Family Fun: This recipe is ideal for kids and adults alike. Gather the family around for a fun-filled cookie-decorating session.
- Beautiful Gift Idea: Pack these cookies in a festive tin or bag for a thoughtful homemade gift.
- Burst of Flavor: The buttery base pairs perfectly with the tangy lemon glaze or sweet vanilla icing.
More Christmas Baking Ideas:
- Grinch Crinkle Cookies – These bright green cookies are fun, festive, and finished with a sweet sugar heart, making them the perfect treat to spread Christmas cheer.
- Santa Hat Cookies – Adorable and delicious, these Linzer-style cookies are filled with fruity jam and topped with icing for the perfect Santa hat look.
- Melted Snowman Cookies – Fun and whimsical, these sugar cookies feature melted marshmallows and chocolate decorations for a snowman that’s sure to melt your heart.
- Marbled Chocolate Christmas Cookies – Elegant and easy, these buttery cookies are decorated with swirls of white and dark chocolate for a dazzling holiday treat.
- Cinnamon Stars (Zimtsterne) – A German Christmas classic, these star-shaped cookies are made with almonds, hazelnuts, and a sweet glaze, delivering a taste of tradition with every bite.
Watch the recipe video here. Let’s get to baking! Here is the full recipe:
Summary

Recipe Name
Author Name
Marbled Christmas Cookies
Isabel
Published On