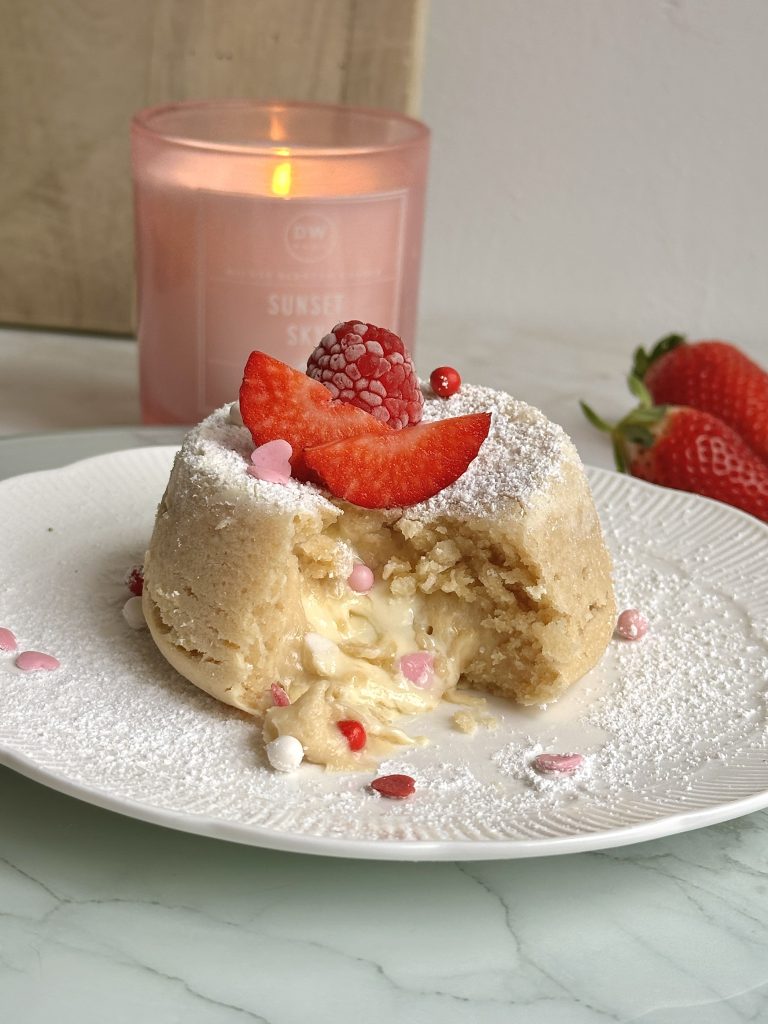

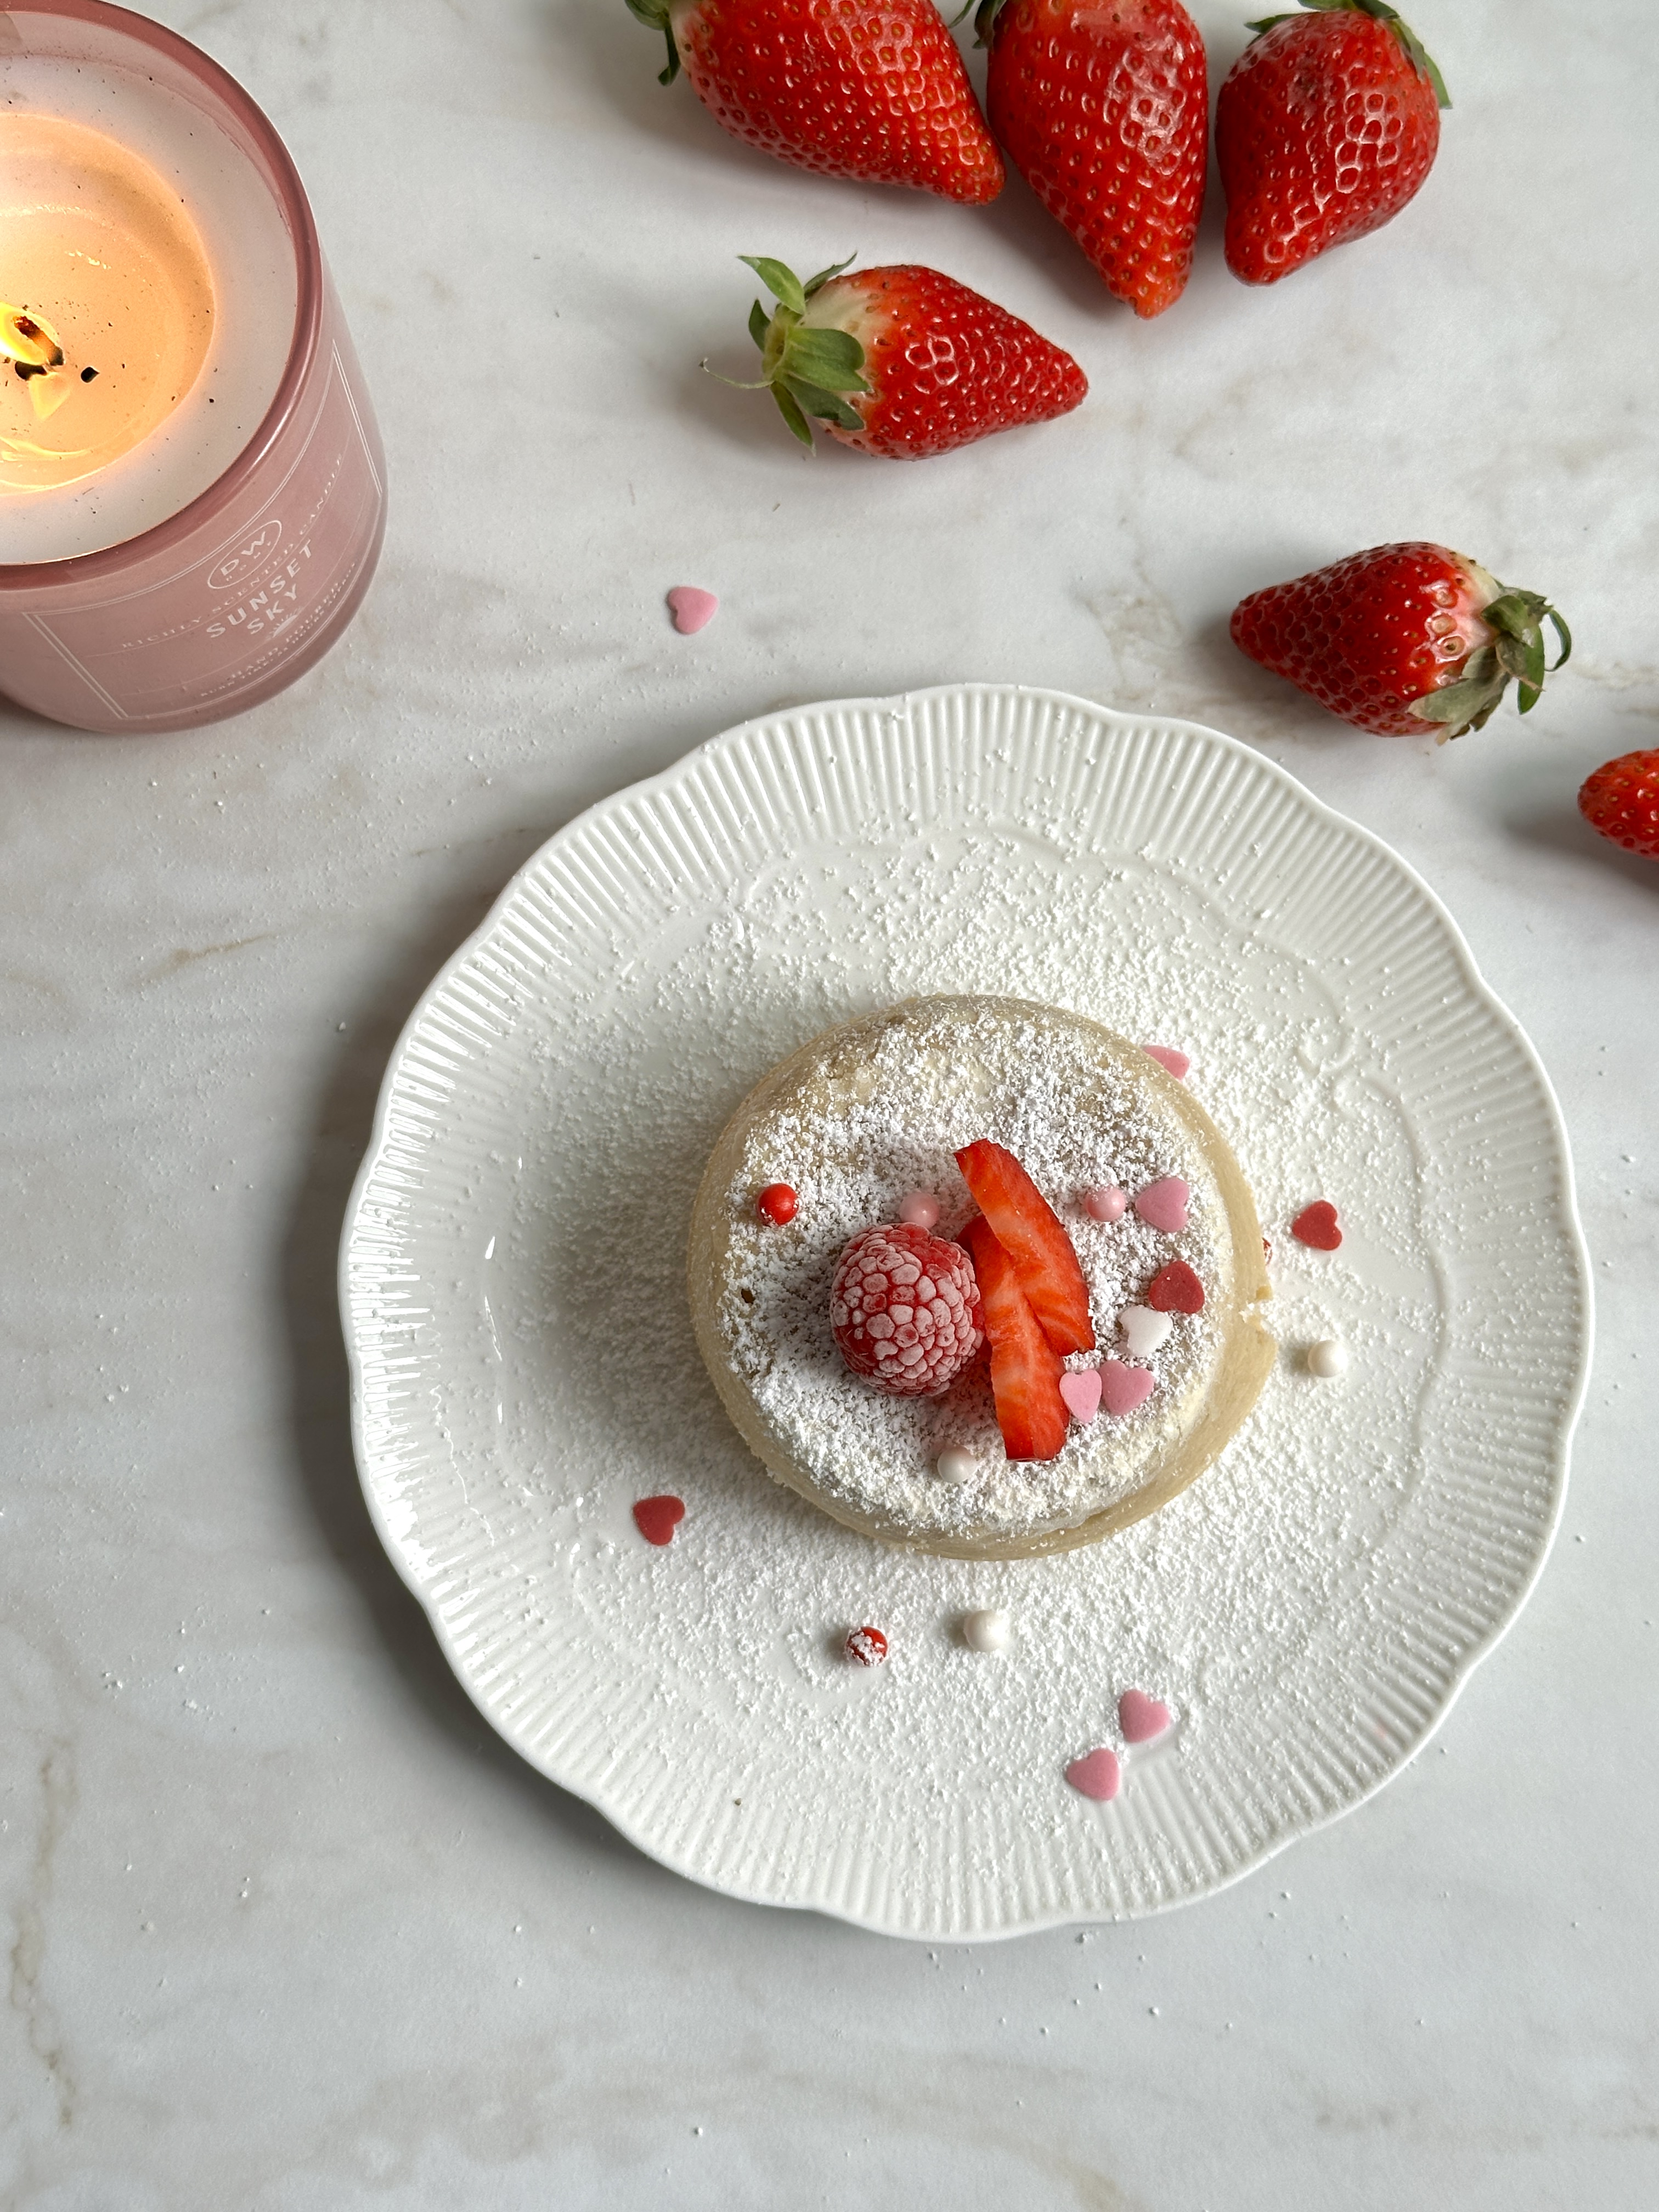
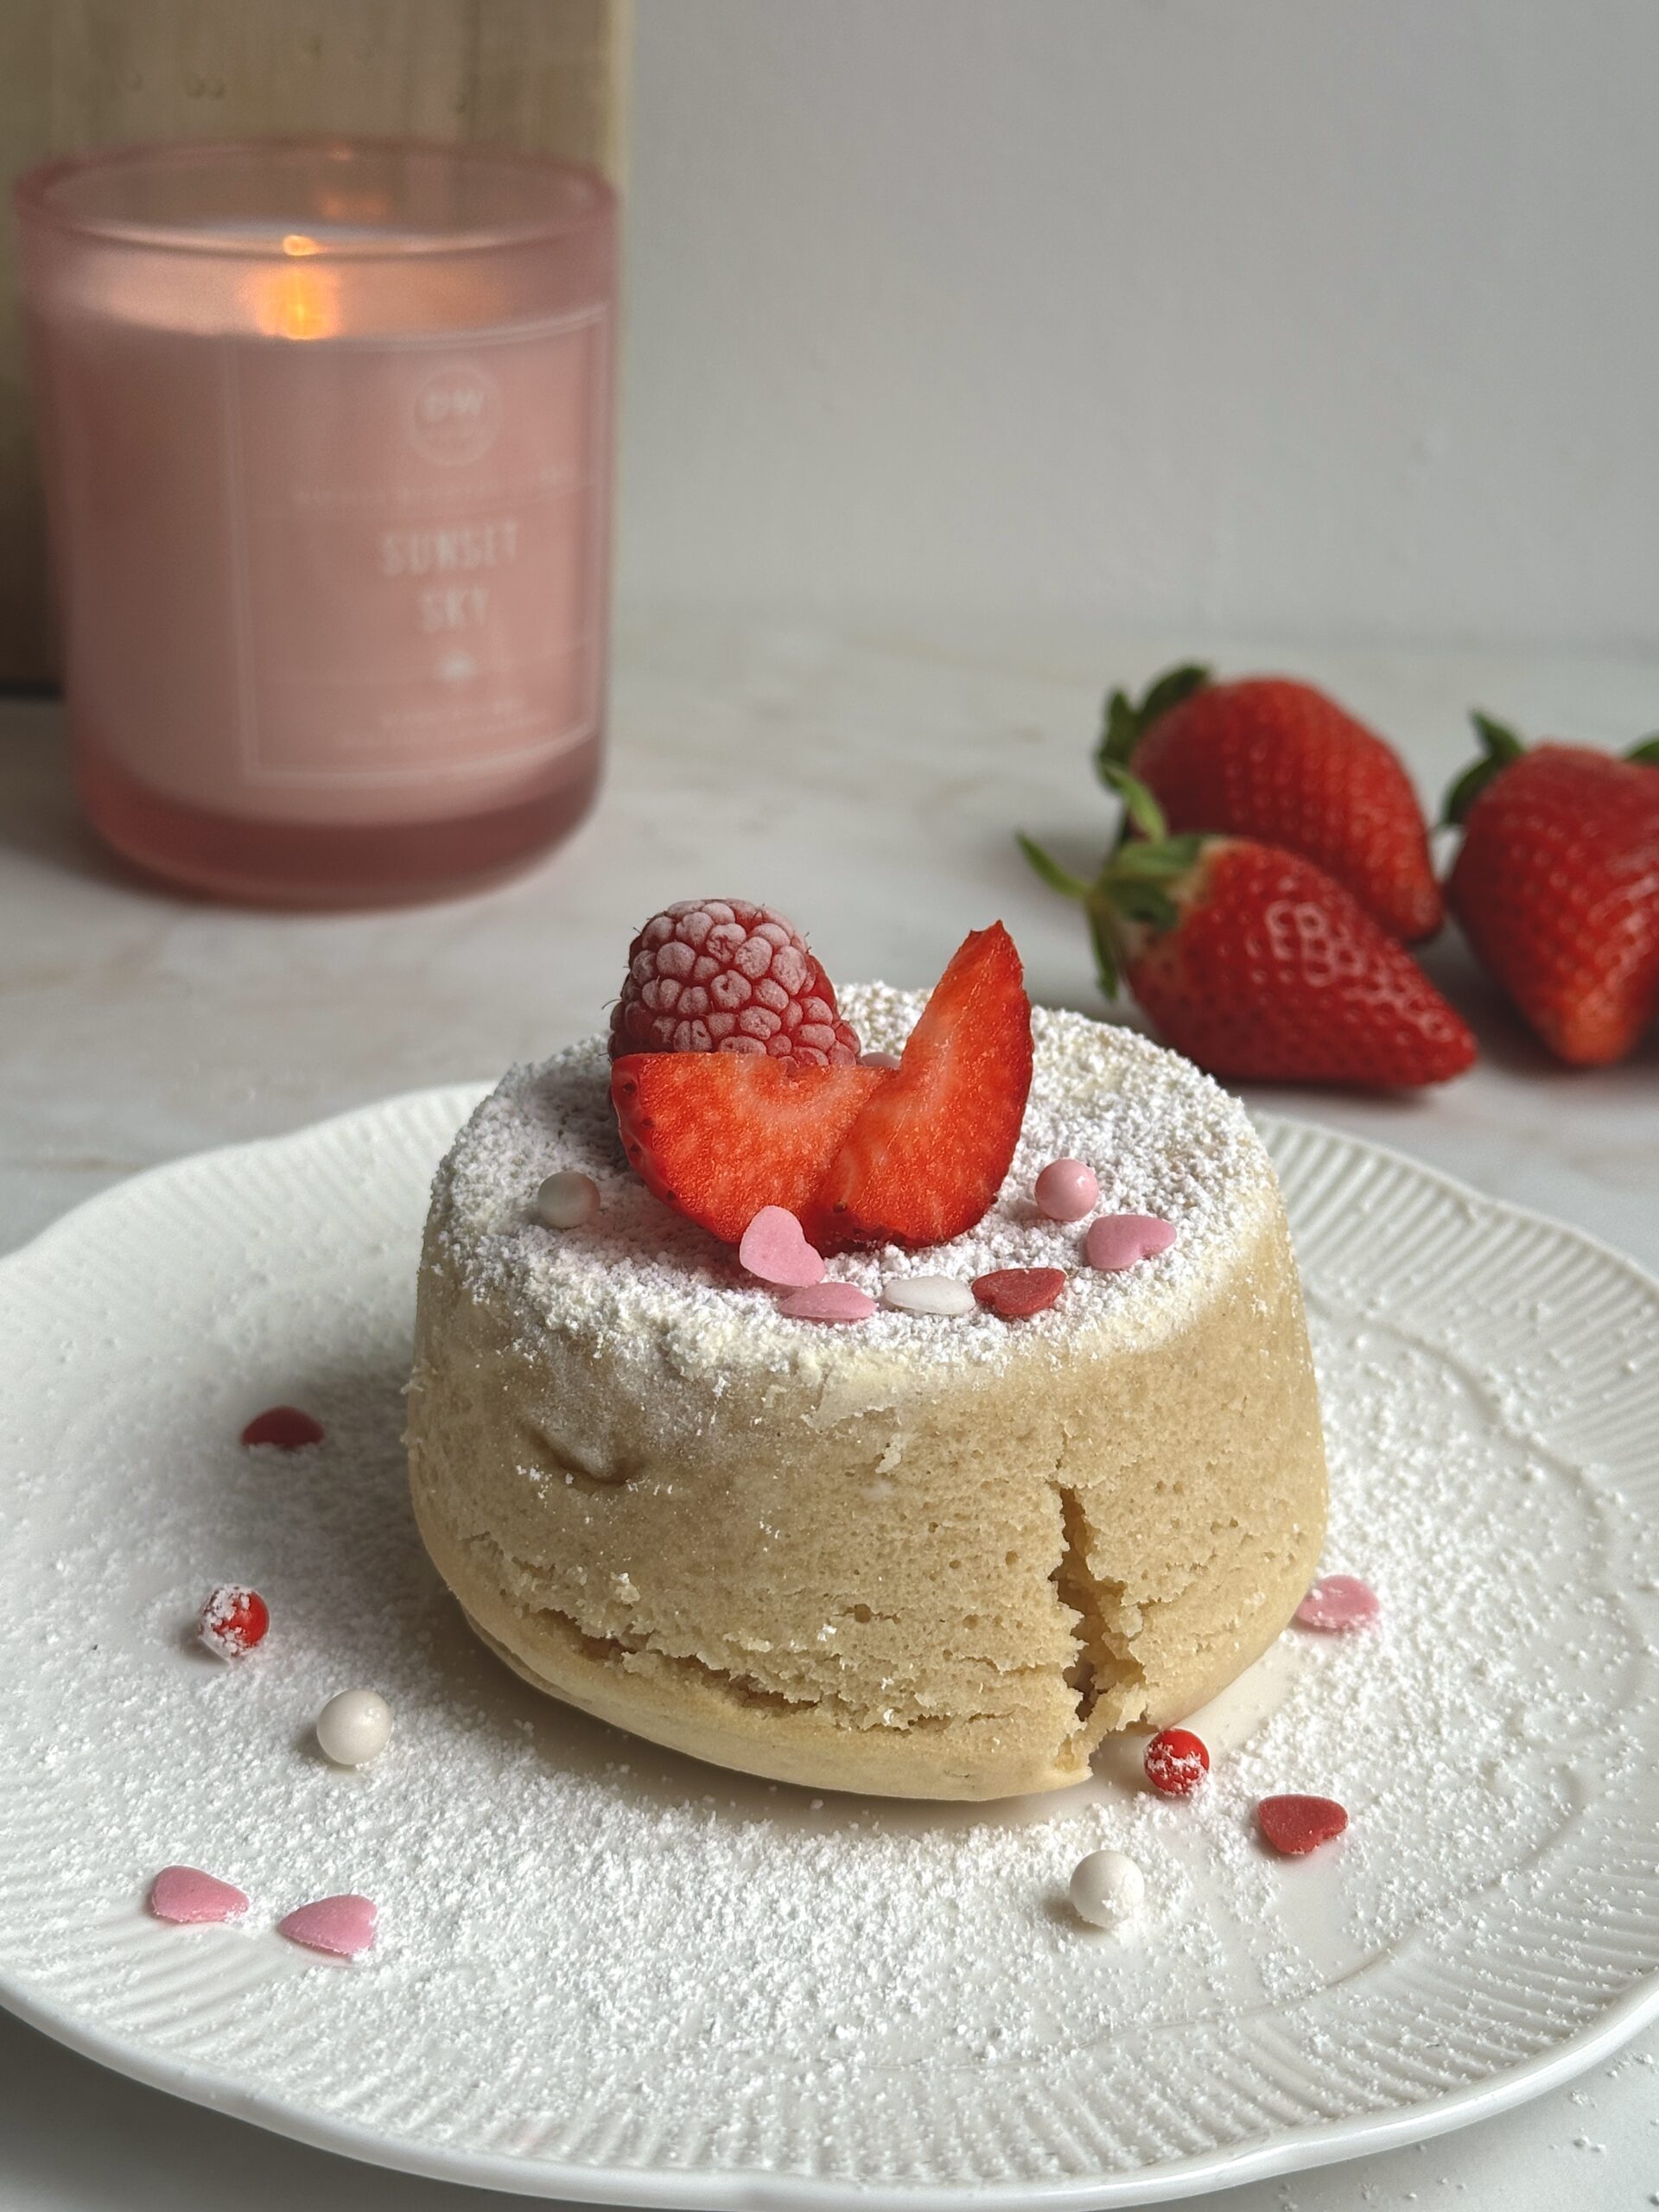
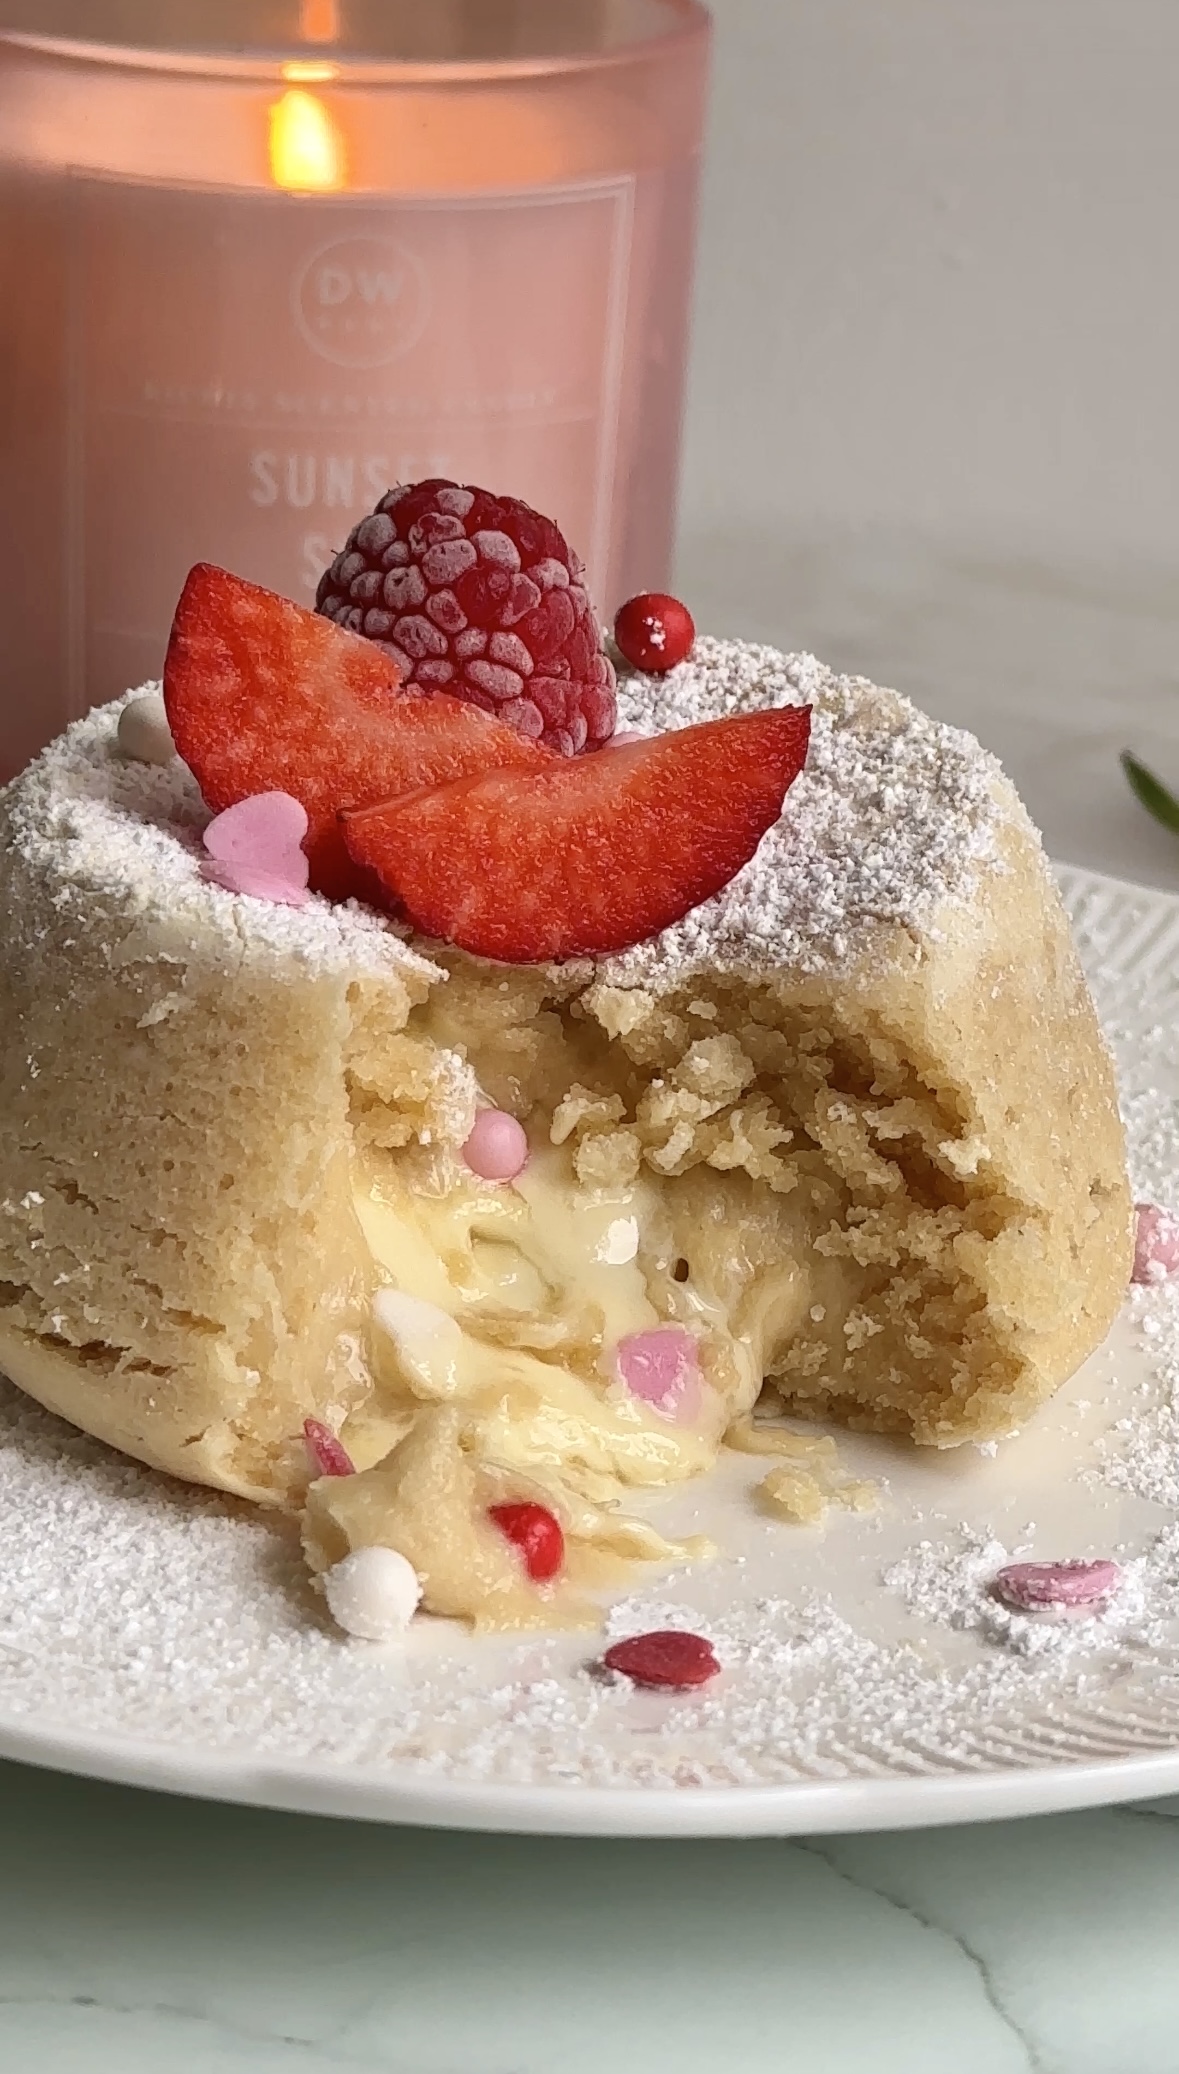
When it comes to desserts, there’s something magical about lava cakes—gooey centers, rich flavors, and that perfect balance between indulgence and elegance. My White Chocolate Lava Cake takes this classic treat to the next level. Whether it’s Valentine’s Day or you just want to spoil yourself with a delightful dessert, this recipe is easy to follow and absolutely irresistible!
Why You’ll Love This White Chocolate Lava Cake
- Vegan-Friendly: No dairy, no eggs—just plant-based goodness. Simply replace the white chocolate with vegan white chocolate.
- Rich & Gooey Center: Melt-in-your-mouth white chocolate filling that’s to die for.
- Perfect for Two: This recipe is sized just right for two small ramekins—ideal for sharing.
- Easy & Quick: Ready in less than 30 minutes with simple pantry ingredients.
- Customizable Toppings: Pair with fresh berries, powdered sugar, or a drizzle of (vegan) caramel.

Ingredients You’ll Need for the White Chocolate Lava Cake:
- All-Purpose Flour: Provides the base structure for the cake.
- Baking Powder: Helps the cakes rise to perfection.
- Pinch of Salt: Balances the sweetness and enhances the flavors.
- White Chocolate: Melted into the batter for creamy richness and some solid white chocolate for the filling.
- Cashew Butter: Adds creaminess and a subtle nutty flavor to the cake.
- Coconut Oil: Keeps the cake moist and adds richness.
- Maple Syrup: A natural sweetener for the perfect balance of sweetness.
- Dairy-Free Milk: Keeps the batter smooth and creamy.
- Vanilla Extract: Adds warmth and enhances the white chocolate flavor.
Here are the essential tools you’ll need for making the White Chocolate Lava Cake:
- Two Ramekins: To bake the lava cakes.
- Mixing Bowl: For combining the ingredients.
- Whisk or Fork: To mix the batter.
- Microwave-Safe Bowl: To melt the white chocolate and coconut oil.
- Piping Bag (or a plastic bag): To pipe the batter into the ramekins.
- Baking Sheet: To place the ramekins on for baking.
- Small Plates: For flipping and serving the lava cakes.
- Sifter: Optional, for dusting powdered sugar on top.
Here is the full Recipe:
Ingredients:
- 120 g (1 cup) all-purpose flour
- 2 g (1/2 tsp) baking powder
- 86 g (1/2 cup) white chocolate (melted)
- 96 g (6 tbsp) cashew butter
- 84 g (6 tbsp) coconut oil
- 126 g (6 tbsp) maple syrup
- 120 ml (1/2 cup) dairy-free milk
- 3-4 drops vanilla extract (a dash)
- a pinch of salt
- 56-84 g (8-12 tbsp) white chocolate (for filling)
Directions:
Step 1: Prepare the Ramekins
- Grab two ramekins and generously grease each with coconut oil.
- Add 1 tbsp of flour to each ramekin. Shake and tilt the ramekins until they’re coated with a thin layer of flour. This prevents the cakes from sticking and ensures a perfect release.
Step 2: Melt the White Chocolate
- In a microwave-safe bowl, melt 1/4 cup of white chocolate with the coconut oil. Heat in short intervals, stirring in between, until smooth and fully melted.
Step 3: Make the Batter
- In a large mixing bowl, combine the flour, baking powder, and a pinch of salt.
- Add the melted white chocolate mixture, cashew butter, maple syrup, dairy-free milk, and a dash of vanilla extract.
- Whisk everything together until smooth and well combined.
Step 4: Pipe the Batter
- Transfer the batter to a piping bag (or a plastic bag with the tip cut off) for easy assembly.
Step 5: Assemble the Cakes
- Pipe 1/4 of the batter into each ramekin, ensuring the bottom is evenly covered.
- Place 2-3 tablespoons of white chocolate chips in the center of each ramekin for the filling.
- Pipe the remaining batter on top, making sure the white chocolate chips are fully covered.
Step 6: Bake
- Preheat your oven to 350°F (175°C).
- Place the ramekins on a baking sheet and bake for 15-17 minutes, or until the edges are set but the center is still slightly jiggly.
Step 7: Cool & Flip
- Remove the ramekins from the oven and let them cool for 3-5 minutes.
- Place a small plate on top of each ramekin and gently flip it upside down. Carefully lift the ramekin to reveal your lava cake.
Tips for the Perfect Lava Cake:
- Grease & Flour the Ramekins Properly: This ensures the cakes come out cleanly without breaking apart.
- Don’t Overbake: The center should remain gooey, so keep an eye on the oven.
- Use High-Quality White Chocolate: This makes all the difference in flavor and texture.
- Customize the Filling: Swap white chocolate chips for dark chocolate, nut butter, or fruit preserves for a twist.
Frequently Asked Questions (FAQ)
- Can I make this recipe gluten-free? Yes, simply swap all-purpose flour for a gluten-free 1:1 baking flour.
- What can I use instead of cashew butter? Almond butter, tahini, or even coconut cream can be used as substitutes.
- Can I make this ahead of time? You can prepare the batter and refrigerate it in the ramekins for up to 24 hours. Bake just before serving.
- Can I double the recipe? Absolutely! Double the ingredients and use four ramekins instead of two.
More Healthy Recipes:
- Mini Protein Cheesecakes – These creamy and indulgent mini cheesecakes are packed with over 9g of protein per serving! Made with a graham cracker crust, Greek yogurt, and light cream cheese, they’re the perfect guilt-free dessert.
- Double Chocolate Protein Cookies -Soft, chewy, and loaded with chocolatey goodness, these cookies have a secret: chickpea flour and protein powder! Each bite is rich in flavor and protein.
- Healthy Peanut Butter Brownies – Fudgy, gooey, and swirled with creamy peanut butter—these brownies are paleo-friendly, refined sugar-free, and made with almond flour. A healthier spin on a classic treat!
- Strawberry Matcha Clusters – Sweet, tangy, and refreshing! These frozen yogurt clusters are coated in matcha white chocolate and sprinkled with strawberry powder for a vibrant, healthy snack.
Watch the recipe video here. Let’s get to baking! Here is the full recipe:
Summary

Recipe Name
Author Name
White Chocolate Lava Cake
Isabel
Published On