
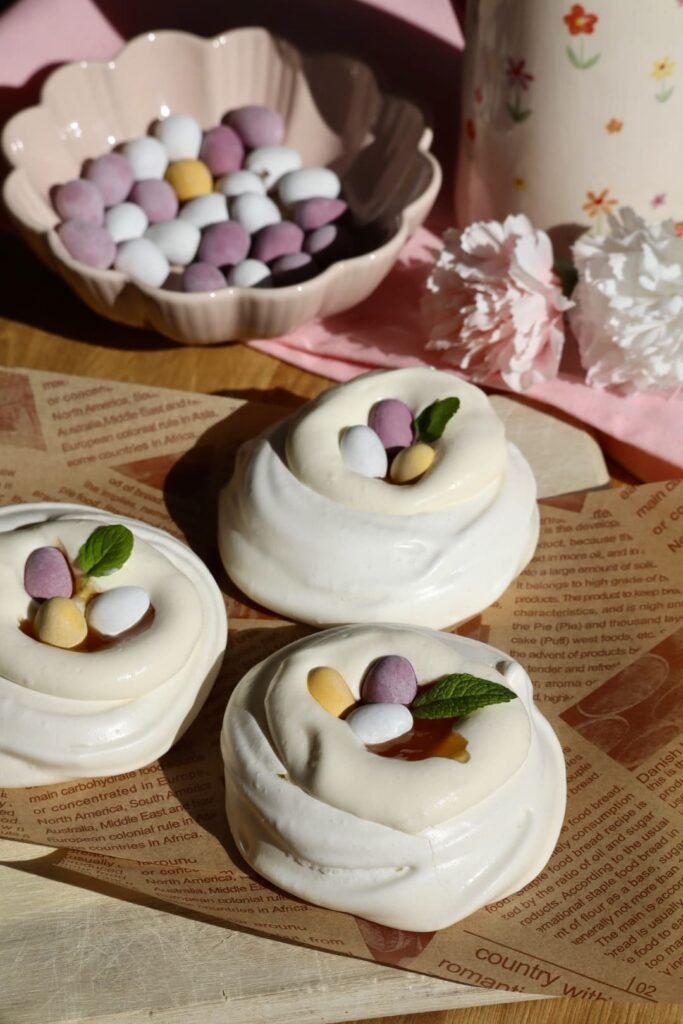
If you’re looking for a light, elegant dessert for Easter that feels special but is surprisingly simple to make, these Easter Pavlova Nests are exactly what you need. With a crisp outer shell, a soft marshmallow-like center, and a creamy filling topped with fresh fruit or Easter candy, they are the perfect combination of texture and flavor.
These mini pavlovas are shaped into delicate nests, making them ideal for Easter celebrations. Once filled with whipped cream and decorated with berries or chocolate eggs, they look like little edible nests — beautiful, festive, and absolutely delicious.
Even better, pavlova is naturally gluten-free, light after a heavy meal, and can be prepared in advance, making it a stress-free dessert option for hosting.
What Are Pavlova Nests?
A pavlova is a classic dessert made from whipped egg whites and sugar, baked at a low temperature until crisp on the outside and soft inside. For this version, the meringue is shaped into small nests, creating a natural cavity for fillings.
Unlike traditional cakes, pavlova relies entirely on technique rather than complicated ingredients. When done correctly, the result is a glossy, stable meringue that holds its shape beautifully while staying delicate and airy.
These Easter pavlova nests are perfect for customizing – you can fill them with whipped cream, lemon curd, mascarpone cream, or even a light vanilla pudding, and top them with your favorite fruits or Easter decorations.
Why You’ll Love These Easter Pavlova Nests
- Light and airy dessert, perfect after a big Easter meal
- Beautiful and festive presentation
- Naturally gluten-free
- Made with simple pantry ingredients
- Customizable with different toppings and fillings
- Make-ahead friendly
- Perfect for spring and Easter gatherings
Ingredients You’ll Need for the Easter Pavlova Nests
For the Pavlova Nests
- Egg whites: The base of the meringue, providing structure and volume.
- Granulated sugar: Stabilizes the egg whites and creates the crisp shell.
- Cornstarch: Helps create the soft, marshmallow-like center.
- Salt: Enhances flavor and balances sweetness.
- Lemon juice or white vinegar (optional): Stabilizes the meringue and helps keep it bright white.
For the Filling
- Heavy whipping cream: Creates a light, creamy contrast to the crisp pavlova.
- Vanilla sugar or vanilla extract: Adds flavor to the whipped cream.
For Decoration
- Fresh berries: Add freshness and color.
- Mini chocolate eggs: Perfect for an Easter nest look.
- Optional toppings: Lemon curd, jam, mini eggs or powdered sugar.
For Making the Easter Pavlova Nests, Here Are the Essential Tools You’ll Need
- Mixing bowl: Must be completely clean and grease-free to ensure the egg whites whip properly.
- Electric mixer: Essential for achieving stiff, glossy peaks.
- Spatula: Used to gently fold in cornstarch and optional acid.
- Baking tray: For baking the pavlova nests evenly.
- Parchment paper: Prevents sticking and helps shape the nests.
- Spoon or piping bag: Used to form the nests.
Here is the full Recipe for the Easter Pavlova Nests
Ingredients:
Pavlova Nests
- 2 egg whites
- 100 g (1/2 cup) granulated sugar
- 1 tsp cornstarch
- 1 pinch salt
- 1/2 tsp lemon juice or white vinegar (optional)
Filling
- 200 ml (3/4 cup + 2 tbsp) heavy whipping cream
- 1 packet vanilla sugar Alternative: 30 g (2 tbsp) sugar + 1 tsp vanilla extract
Toppings
- Fresh berries
- Mini chocolate eggs
Directions:
- Prepare the Oven
Preheat your oven to 100°C (210°F) using top and bottom heat (no fan). Line a baking tray with parchment paper. - Make the Meringue
In a clean bowl, whip the egg whites with a pinch of salt until soft peaks form.
Gradually add the sugar, one tablespoon at a time, while continuing to whip. This step is crucial — slow addition ensures a stable, glossy meringue.
Continue whipping until stiff peaks form and the mixture is thick, shiny, and smooth.
Gently fold in the cornstarch and optional lemon juice using a spatula. - Shape the Nests
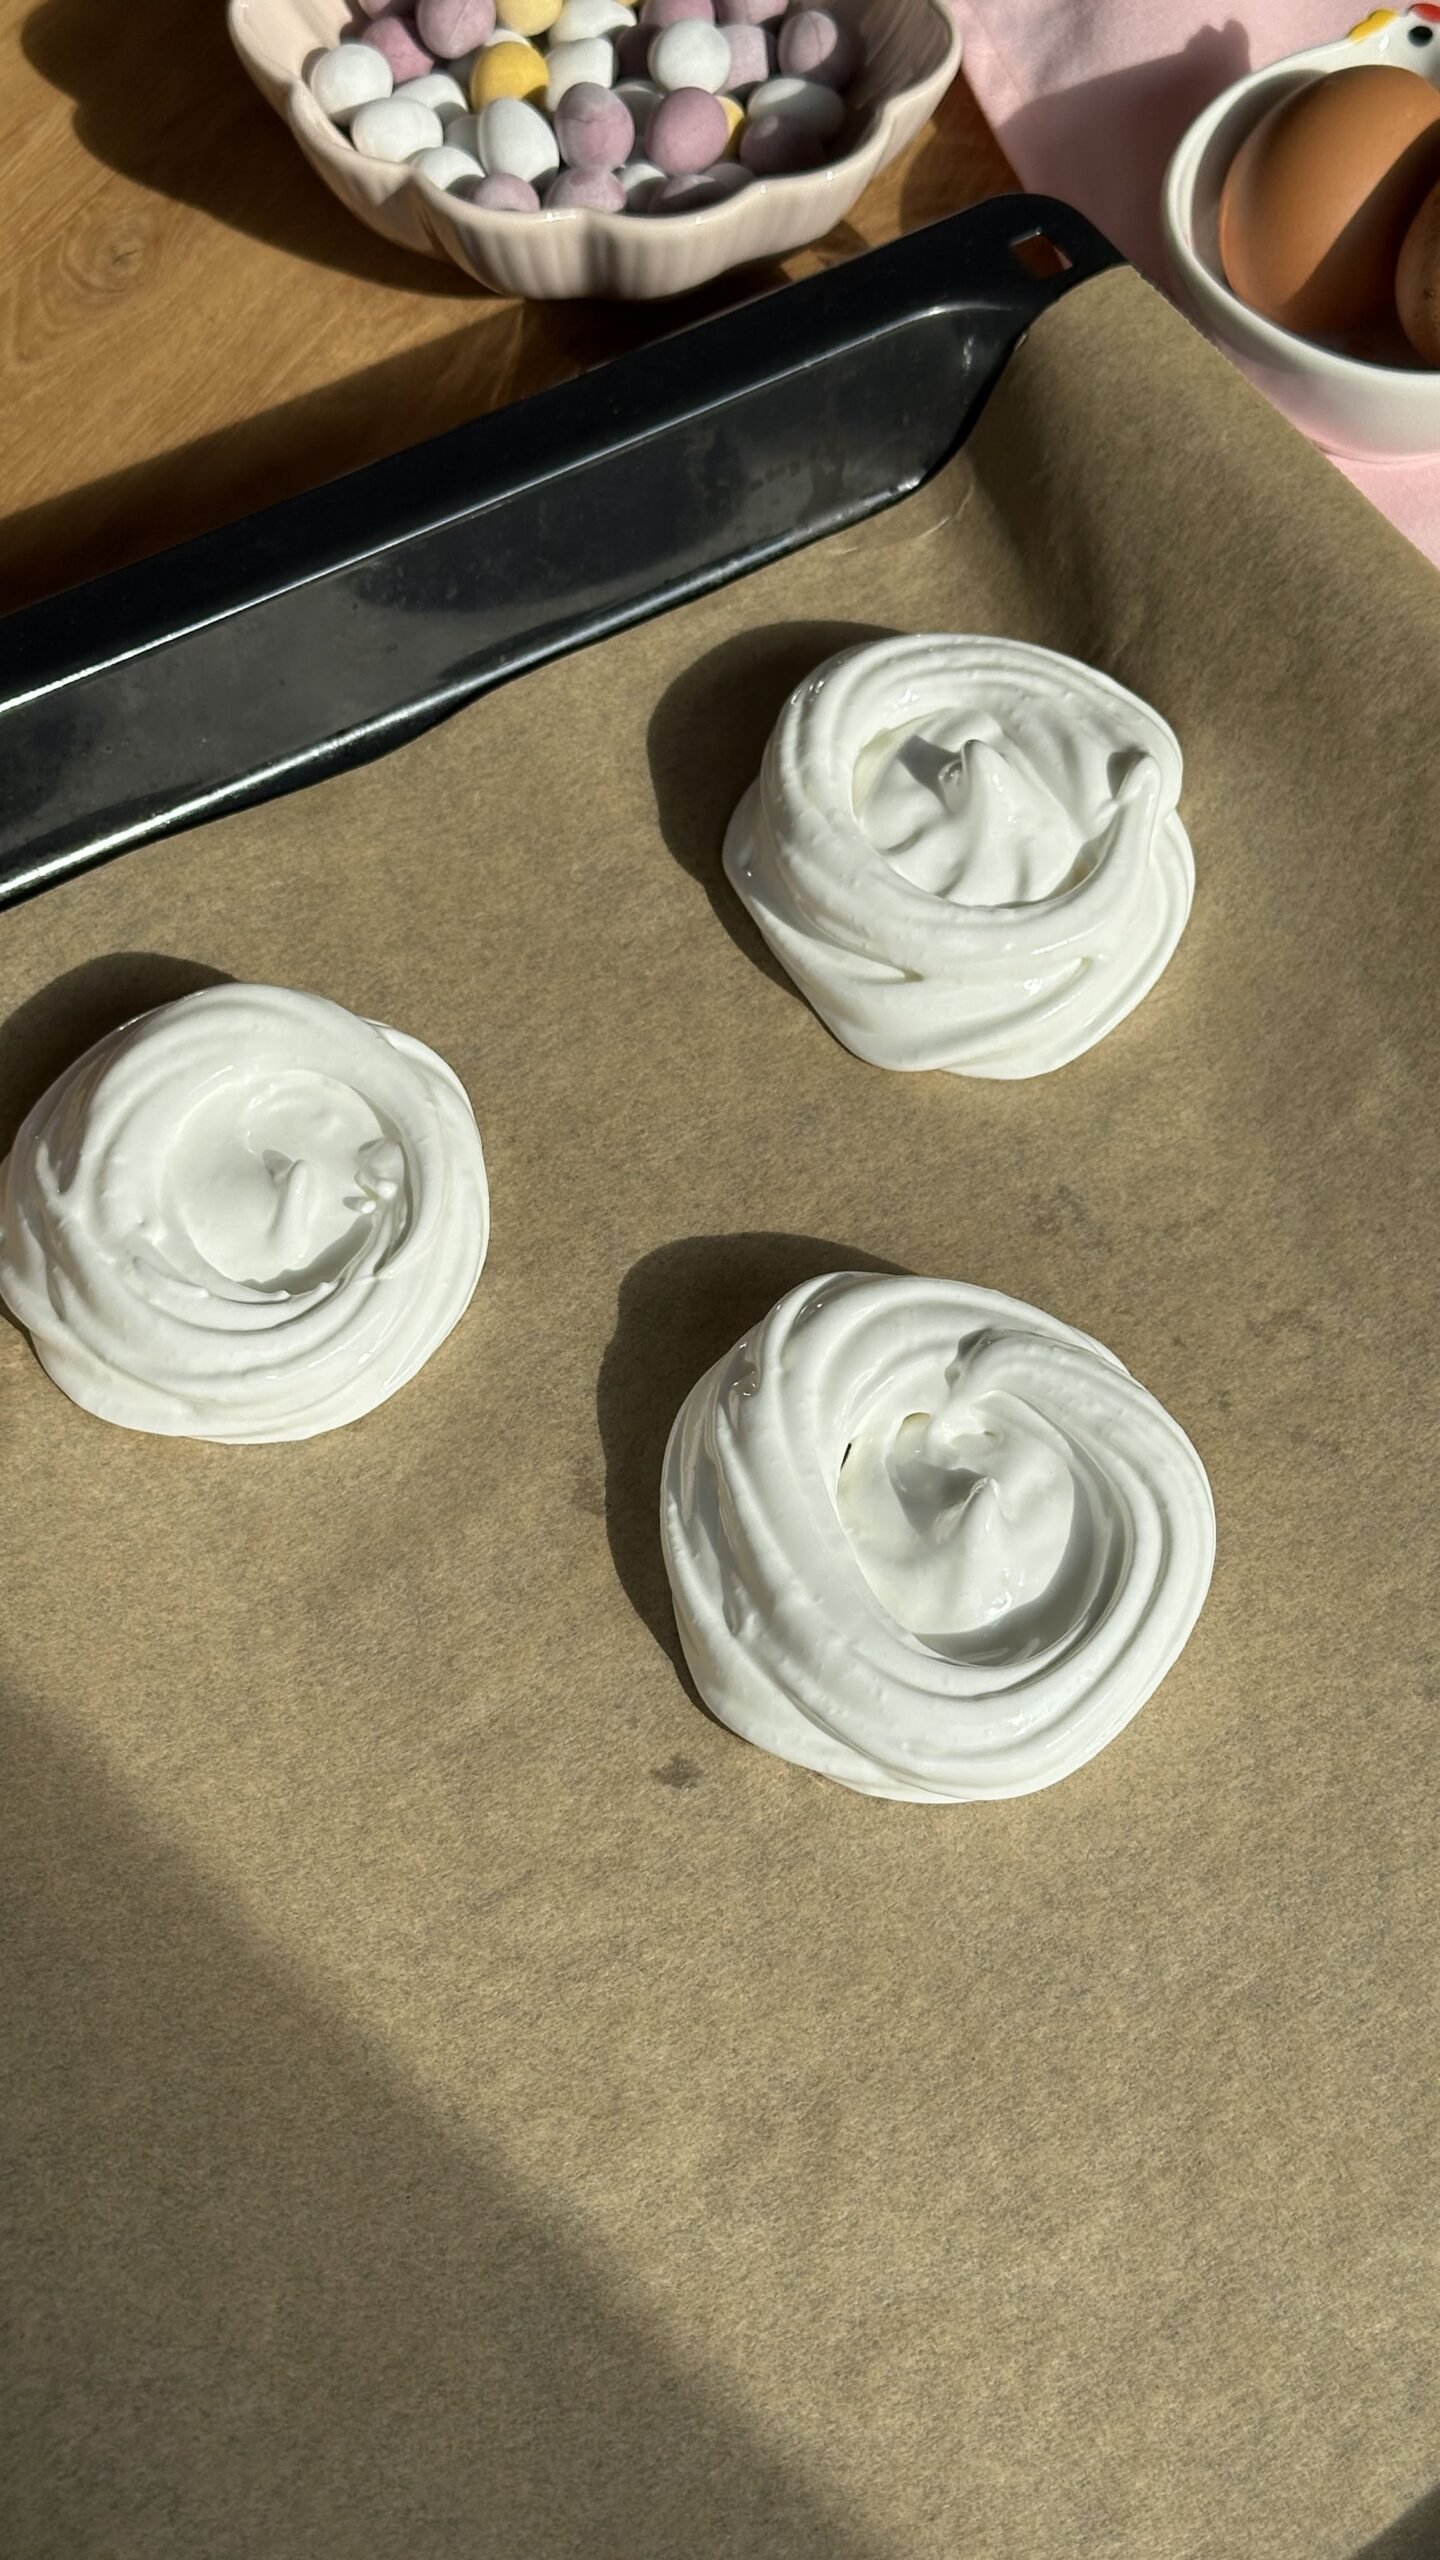
Spoon or pipe the meringue onto the prepared baking tray into small circles (about 6–8 cm in diameter).
Create a slight indent in the center of each nest using the back of a spoon. Build up the edges slightly to form a nest shape. - Bake and Dry
Bake for 60–70 minutes until the pavlovas feel dry to the touch but remain pale.
Turn off the oven, slightly open the door, and let the pavlovas cool inside for at least 3–4 hours, preferably overnight.
This slow cooling process prevents cracking and ensures the perfect texture. - Prepare the Filling
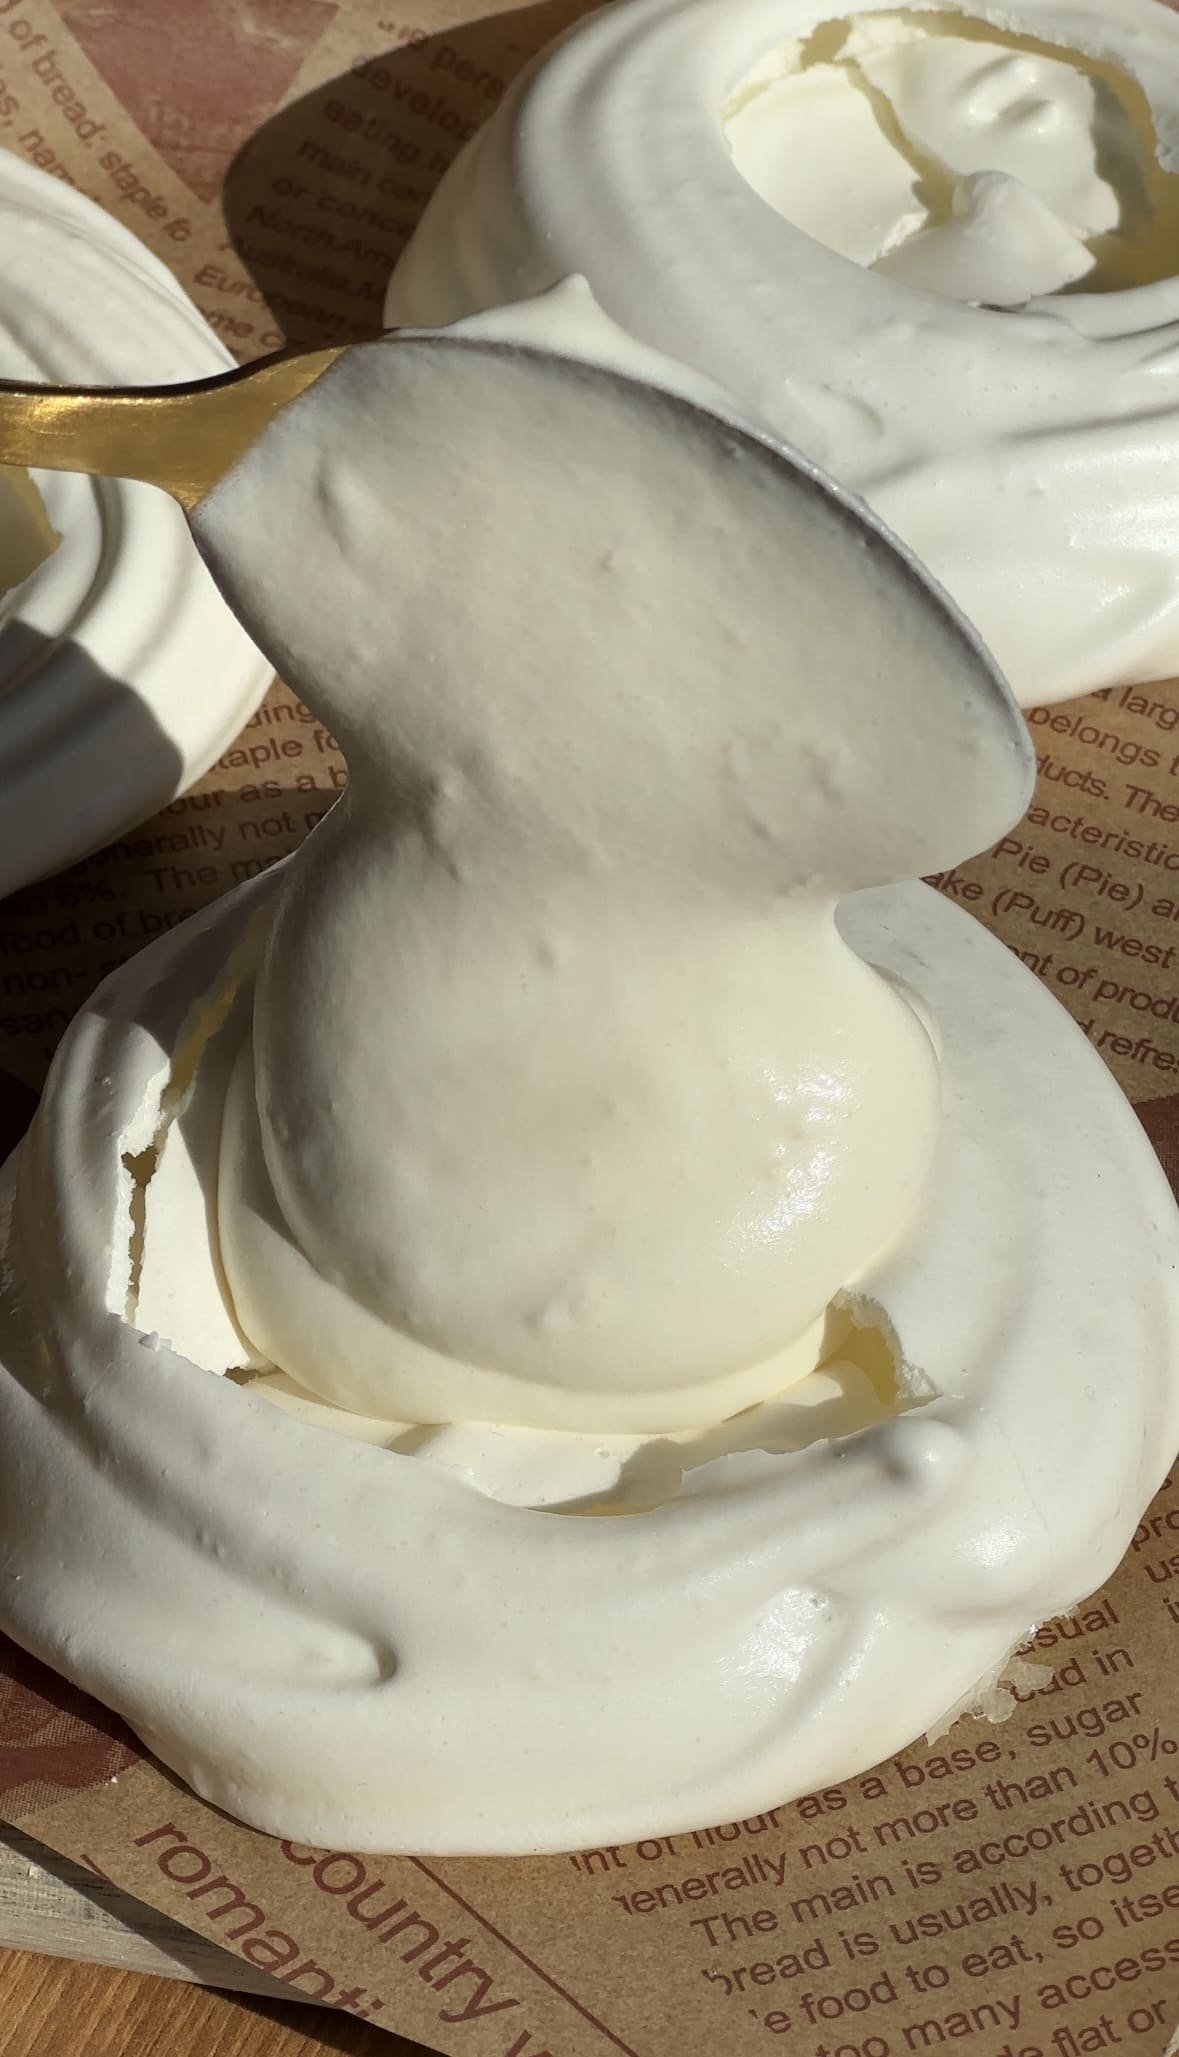
Whip the heavy cream with vanilla sugar (or your chosen alternative) until soft peaks form.
The cream should be light and fluffy, not overly stiff. - Assemble the Pavlova Nests
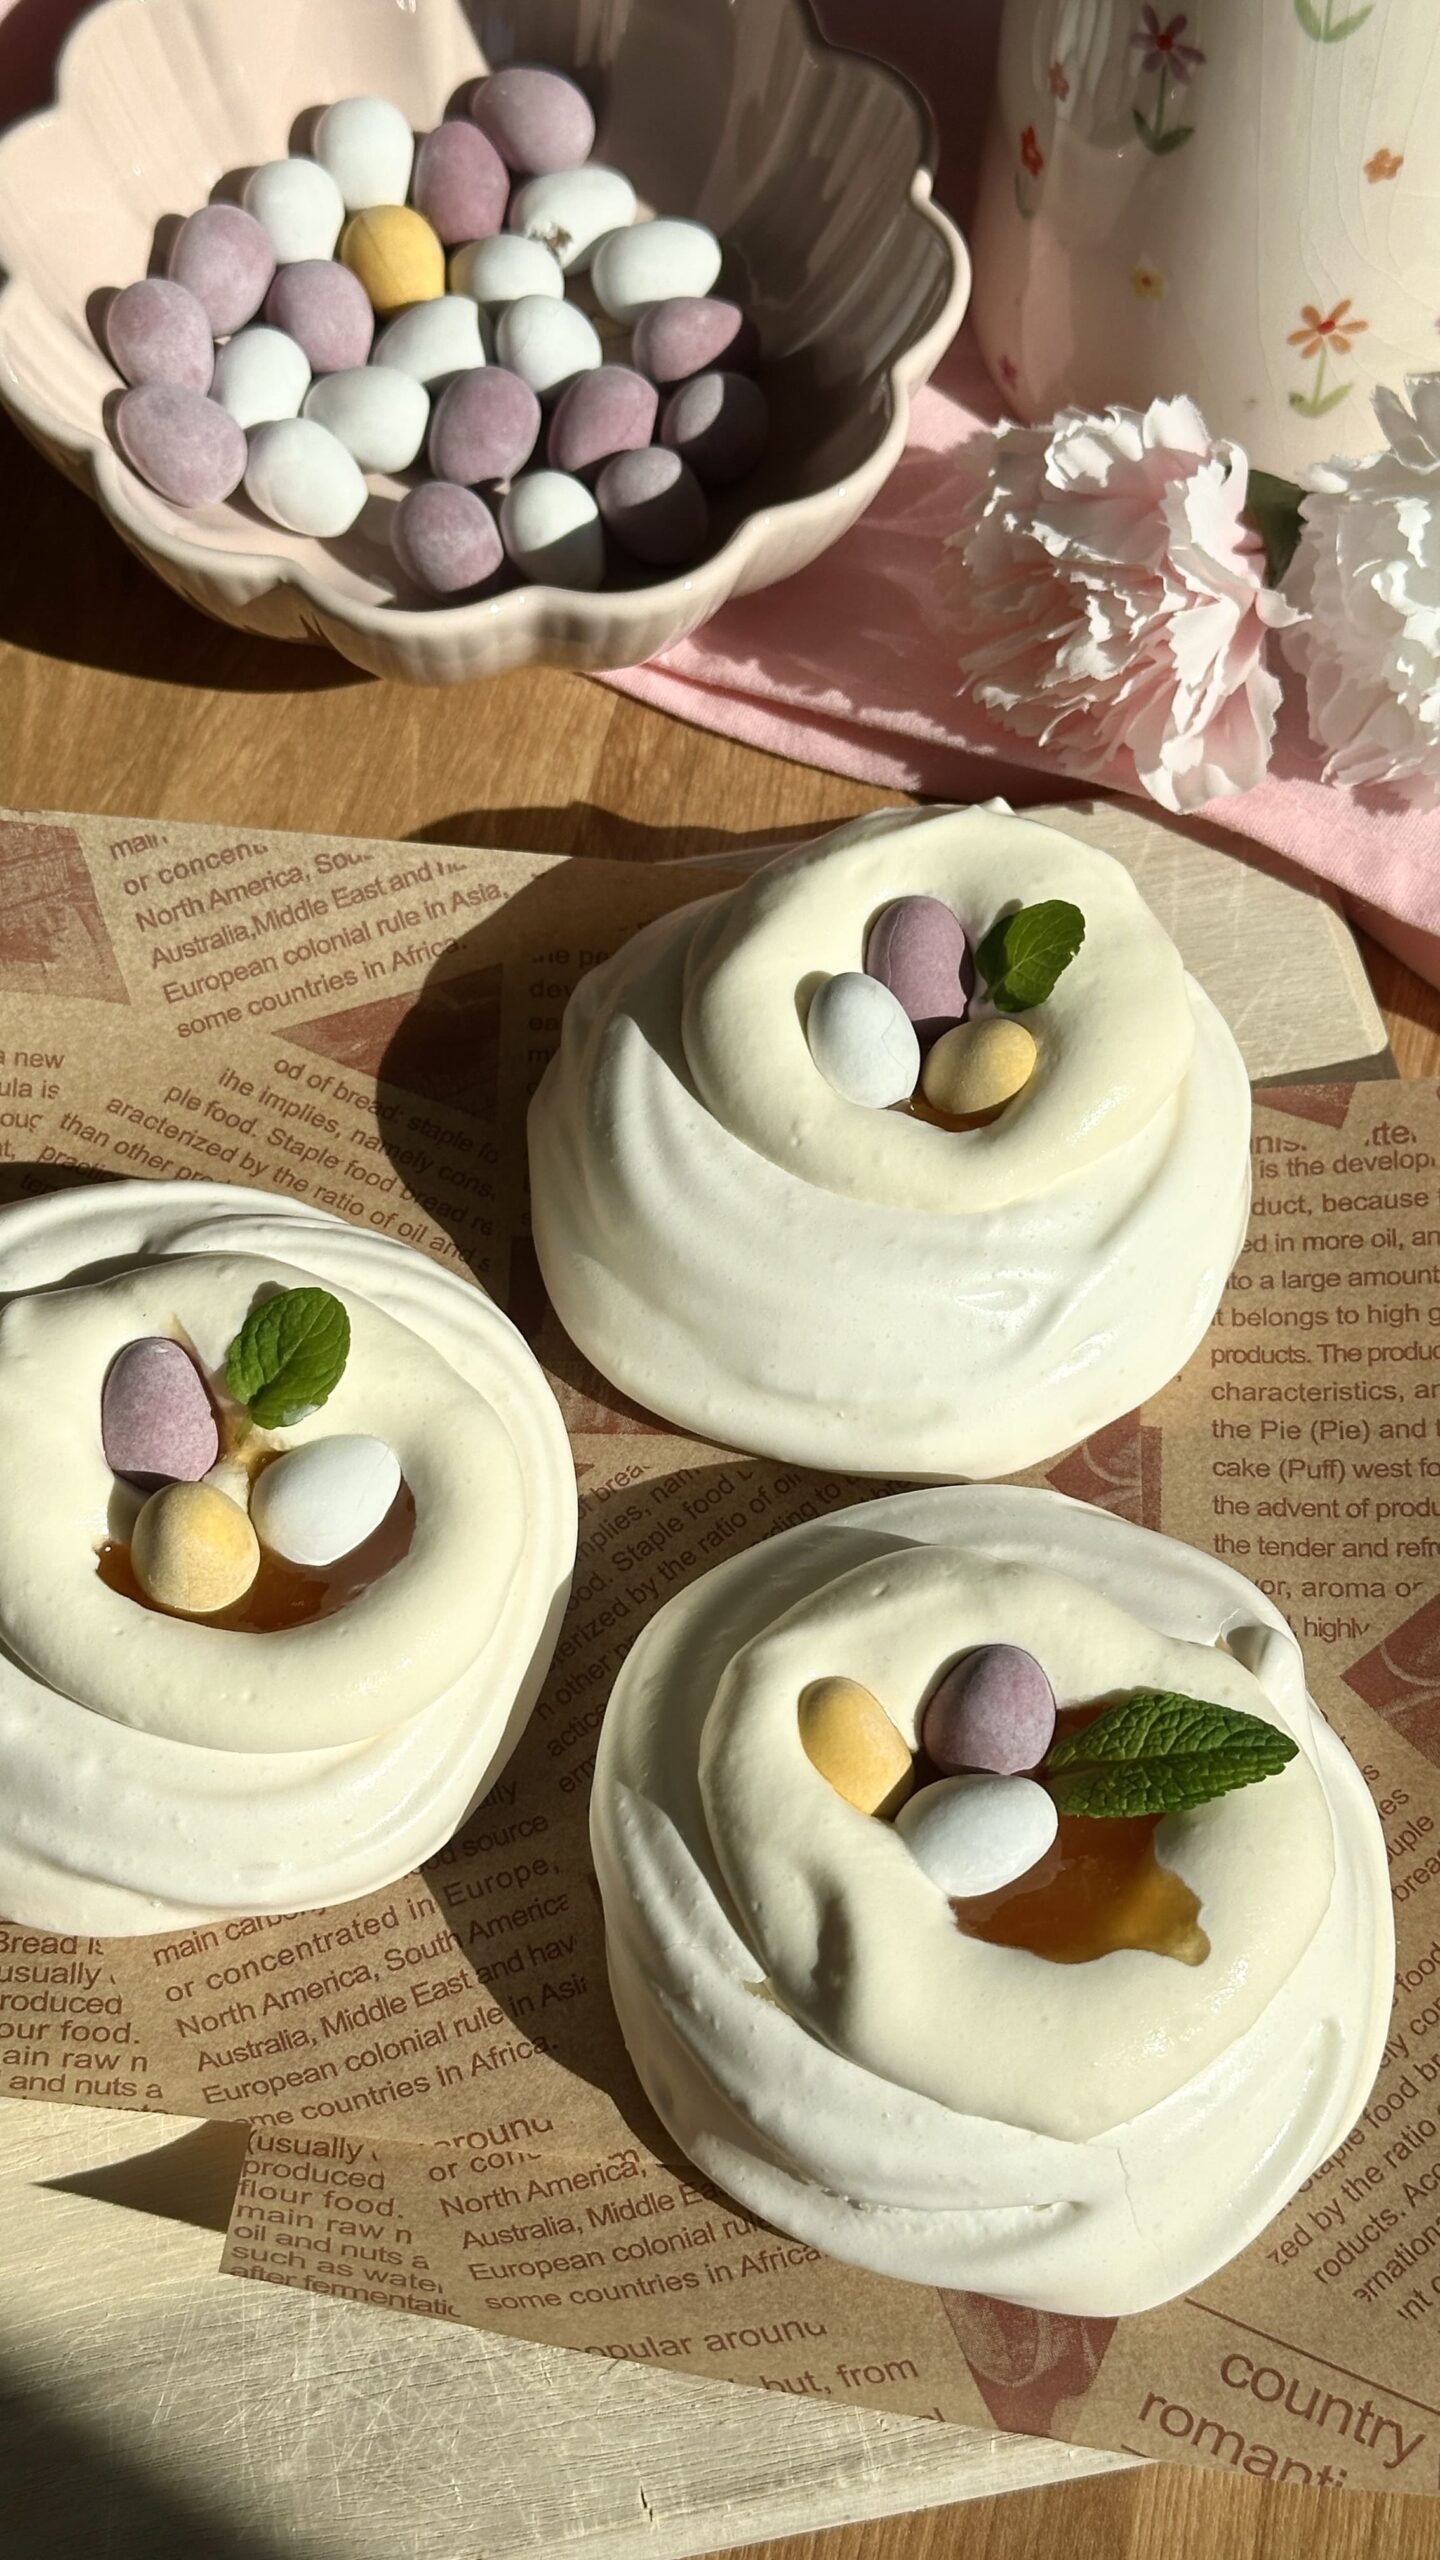
Just before serving, fill each pavlova nest with whipped cream.
Top with fresh berries and mini chocolate eggs to create a festive Easter look.
Serve immediately.
Tips for Perfect Pavlova
- Use room temperature egg whites
- Make sure your bowl is completely grease-free
- Add sugar slowly for a stable meringue
- Do not rush the baking or cooling process
- Always fill pavlova just before serving
Storage & Make-Ahead Tips
- Pavlova nests: Can be made 1–2 days in advance and stored in an airtight container.
- Whipped cream: Best made fresh.
- Assembled pavlova: Best enjoyed within a few hours.
Final Notes
These Easter Pavlova Nests are the perfect combination of simplicity and elegance. With their crisp shell, soft center, and fresh toppings, they are a beautiful addition to any Easter table.
Whether you’re hosting a brunch, planning a festive dessert, or simply want something light and fresh, these pavlova nests are guaranteed to impress.
Happy Easter baking!
More Baking Ideas:
- Strawberries & Cream Cookies – Soft, buttery cookies infused with fresh strawberries and a velvety cream filling – the ultimate summer treat!
- White Chocolate Raspberry Cookies -Delight in the perfect balance of sweet white chocolate and tart raspberries with every bite of these irresistible cookies.
- Lemon Poppy Seed Cookies -These zesty lemon cookies with a hint of poppy seed crunch will brighten up your day with a refreshing burst of flavor.
- Lemon Cheesecake Cookies with Blueberry Curd – Bright, tangy, and irresistibly creamy, these Lemon Cheesecake Cookies with Blueberry Curd are a zesty delight topped with a luscious blueberry swirl. Perfect for citrus lovers looking for a sweet twist!
Watch the recipe video here. Let’s get to baking! Here is the full recipe: